

Introduction to Wifite
Wifite is an automated wireless attack tool, widely used in the cybersecurity industry. It simplifies the process of testing wireless networks by automating the tasks involved in a wireless attack. This tool is particularly useful for IT professionals and cybersecurity enthusiasts who need to ensure the security of wireless networks.
Key Features of Wifite
- Automated Wireless Attack: Automates various wireless network attacks.
- Multiple Attack Modes: Supports WEP, WPA, and WPS encrypted networks.
- User-Friendly Interface: Simplified interface for ease of use.
Installation of Wifite
To use Wifite, you must have a Linux-based operating system, preferably Kali Linux, as it comes pre-equipped with the necessary wireless testing tools.
Step 1: Update System Repository
sudo apt-get update

Step 2: Installing Wifite
If you’re not using Kali, you’re going to need to install it with the following command.
sudo apt-get install wifite
Install wifi dependencies
You don’t have to, but it’s recommended to install hcxdumptool and hcxpcapngtool.

Copy and paste the following command.
sudo apt-get install hcxdumptool && hcxpcapngtool -y
Using Wifite
Before you start, ensure you have the necessary permissions and your wireless card supports monitor mode.
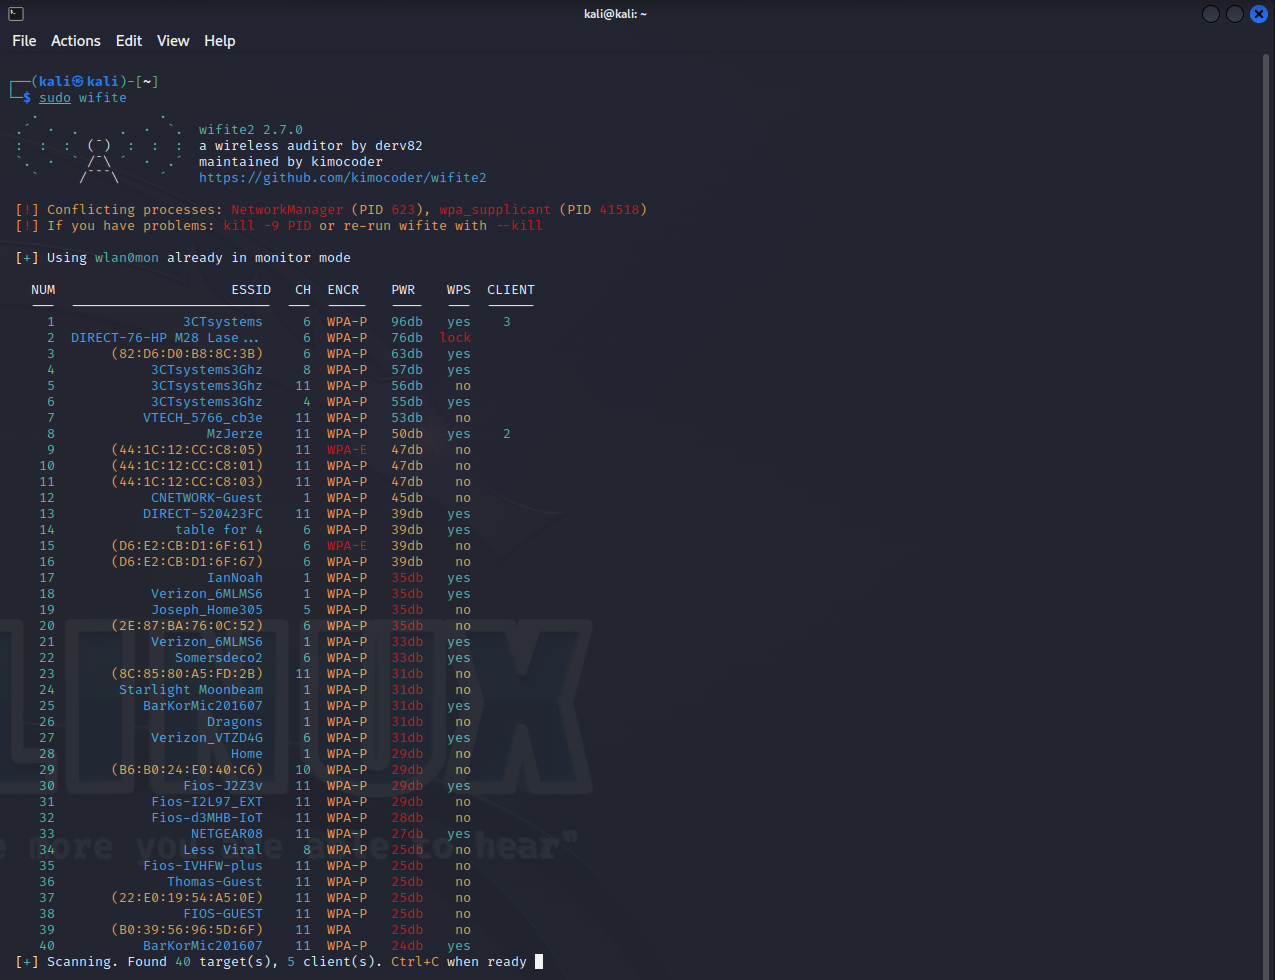
Step 1: Launching Wifite
Open a terminal and type:
sudo wifite
If you want to use wifite with a dictionary attack you need to tell wifite where your dictionary file is. Use the following command to make life easy and use the rockyou.txt dictionary file.
sudo wifite -wpa --dict /usr/share/wordlists/rockyou.txt

Step 2: Selecting a Target Network
Wifite will display a list of available networks. You can select a network for testing by entering the corresponding number. Enter Ctrl-C to break the scanning process. Then select a target on the left-hand side by providing a number or type all.
Step 3: Choosing an Attack
After selecting a network, Wifite will suggest the best attack based on the network’s security protocol (WEP, WPA, WPS). For instance, here I selected network number one, depicted as 3CTsystems3Ghz. This is my home network, so nobody freak out. I gave myself permission to hack my own network.

Step 4: Monitoring the Attack Progress
Once an attack is launched, Wifite will display its progress. For WPA attacks, this may involve capturing a handshake.
Some networks don’t have a lot of traffic or clients and may take a significant amount of time to capture a handshake. That’s where a de-author comes in handy. I created my own de author with an ESP8266 Using this repository. GitHub – SpacehuhnTech/esp8266_deauther: Affordable WiFi hacking platform for testing and learning. Or you can just buy one from Aliexpress. Just search for Deauther.

Step 5: Analyzing the Results
After the attack is complete, Wifite will show the results, including any keys or passwords that were captured.